Pages

Showing posts with label Healthy. Show all posts

Tuesday, August 6, 2013

Caprese Salad

I love Summer in the city! We had a lovely Boston Summer day today - Charlotte, Andy, and I walked around Boston and ultimately ended up at a local farmer's market where we picked up some raspberries to snack on and some farm-fresh peaches for Charbug. Before we left, we picked up some fresh local mozzarella as well as some absolutely delicious heirloom cherry tomatoes, which are pretty much nature's candy...yummm. When we got home, I added some basil from our herb garden and a little balsamic vinegar, and what we ended up with was a perfect, light, delicious summer dinner. This can hardly be called a recipe because all I really did was cut some tomatoes, but regardless of what you call it, this salad sure is delicious! Enjoy! :o)


Caprese Salad
Yield: 2 salads

Ingredients
8 oz. fresh mozzarella*, sliced
1 cup cherry tomatoes
10 leaves basil, torn
2 tbsp balsamic vinegar (the more syrupy, the better)
kosher salt and freshly ground pepper

Directions:
Arrange the mozzarella on two plates and season to taste with salt. Cut the tomatoes in half and put them on top of the cheese, then season with more salt and some pepper. Top with the basil, then drizzle some balsamic vinegar on top and serve. Yum! 

* as a [delicious] substitute, we often use high-quality whole milk ricotta cheese (store bought or homemade) in place of the mozzarella. It is to.die.for! 


Friday, January 4, 2013

Soba Noodles with Shrimp and Cilantro

Do you have a flavor combination that you always gravitate towards? In our house it always seems to be one of three combinations: chocolate & peanut butter, lime & cilantro, or garlic & rosemary. Anytime I run across a recipe with those combinations as main ingredients it is almost always sure to be a hit. True to form, the combination of shrimp, lime, and cilantro in this recipe did not disappoint. 

Because this is a cold pasta dish, I think it would be especially tasty in the hot Summer months, but I decided to make it now because it fits in with our healthy eating regime for January... Biggest Loser is on again in the Tremble household (I hope to retain my title from last year!) and healthy dishes are dominating the menu. 

This was the first time I have cooked with Soba noodles and I am hooked! They are sooo good and I am happily searching for more ways to incorporate them in our meal rotation. 

Soba Noodles with Shrimp and Cilantro
Serves 2 

Ingredients:
6 oz. Soba noodles
1 1/2 tbsp low-sodium soy sauce
1 1/2 tbsp tamari
2 tbsp vegetable oil, divided
1/2 tsp. Sriracha sauce
1/2 tsp. agave syrup
zest of 1 lime
2 tbsp. lime juice (about 1 lime)
3 garlic cloves, peeled and minced
1/2 lb. shrimp, peeled and deveined
pinch of salt
1/4 cup cilantro leaves, roughly chopped
1 green onion, thinly sliced

Directions:
Cook the Soba noodles according to package directions. Drain and rinse under cold water.

In a large serving bowl, mix together the soy sauce, tamari, 1 tbsp. of the oil, Sriracha, and agave. Add the cooled Soba noodles and turn to coat in the sauce.

In a small bowl, mix together the lime zest, juice, garlic, shrimp, a pinch of salt, and the remaining 1 tbsp of oil. Heat a skillet over medium high heat and add the shrimp and lime juice mixture. Cook until the shrimp are barely cooked through, and then pour the shrimp and lime juice over the Soba noodles. Top with the cilantro and green onion and serve cold*. 

*This tastes even better if you make it ahead of time and store in the refrigerator until it's time to eat!


Slightly adapted from Food & Wine

Thursday, August 23, 2012

Broccoli and Chicken Stir Fry with Spicy Peanut Sauce

Disclaimer: this recipe sounds strange. The first time I stumbled across this dish I was so confused - broccoli and peanut butter... together?? Ew. But alas, it is a delicious combination! The peanut sauce is salty, spicy, and slightly sweet and paired with the broccoli and chicken it makes a (surprisingly) delicious dish. Trust me! Oh, and you can easily make this vegetarian by leaving out the chicken and using vegetable stock, so that's always a bonus.

After making chicken satay the other night we found ourselves with some extra peanut sauce (never a bad thing) and I figured I would give it a try as a stir fry sauce and it ended up working perfectly! I think I will always meal plan to have these two dishes in the same week so I can make the sauce once and use it for two recipes... hooray for laziness. Give this recipe a try. It might sound a little weird at first, but it's truly delicious, not to mention very healthy! Enjoy :o)

Broccoli and Chicken Stir Fry with Spicy Peanut Sauce
serves 2

Ingredients
1 tsp. vegetable oil
1 boneless, skinless chicken breast, cut into 1 inch cubes
3 cups broccoli florets
1/2 red or orange bell pepper, cut into 1 inch strips
1/4 cup stock (chicken, beef, or vegetable all work fine)
1/2 cup peanut sauce
red pepper flakes to taste (about 1/4-1/2 tsp)
salt and pepper to taste 
cooked rice for serving (optional)

In a large wok or non-stick skillet, heat the oil over medium high heat. Add the chicken and season with a little salt and pepper. Cook, stirring occasionally, until lightly browned on all sides and cooked through. Remove to a plate. Add the broccoli, bell pepper and stock to the pan and bring to a simmer. Cover and cook for 5 minutes or until the broccoli is crisp-tender. Return the chicken to the pan and add the peanut sauce and red pepper flakes, stirring to coat everything evenly. Cook until everything is heated through, 2 minutes. Serve the stir fry on its own or over rice. Enjoy while hot. Yum!


Tuesday, August 21, 2012

Chicken with Peanut Satay Sauce

Ok ok before all you know-it-alls get antsy, I realize this isn't a "traditional" satay sauce. I didn't grind my own peanuts, I omitted the ginger, and I'm fresh out of lemongrass, but this is still a delicious peanut satay inspired dish. For those of you unfamiliar with satay, it is basically meat that has been marinated and grilled, then dipped in a sweet and salty peanut butter sauce. It's divine. This version is no exception. 

After researching a variety of satay recipes, I found some common ingredients and decided to venture off on my own to make a simplified, yet tasty version using what I had on hand (gosh that seems like a problem of mine). I am happy to report that the experimenting paid off! I wasn't planning to blog this dish, but halfway through dinner I forced Andy to stop eating so I could snap a few photos to add to the blog. He got a little grumpy, but I succeeded. The flavors of this dish are appealing to both adults and kids alike, and this could easily be served as a main dish protein along side a veggie and some rice (edamame in our case), or it could be served room temperature as an appetizer. Whatever floats your boat. Enjoy!

Chicken with Peanut Satay Sauce
Serves 2 main dish portion

Ingredients
Marinade
1/4 cup coconut milk
1 clove of garlic, minced
1/2 tsp. curry powder
1 tsp. brown sugar
1/4 tsp. salt
1/4 tsp. black pepper
2 boneless, skinless chicken breasts cut lengthwise into 1/4 inch strips

Peanut sauce
1/2 cup coconut milk
2 tsp. curry powder
1/4 cup creamy peanut butter (the "natural" peanut butter is better than a Jif or Skippy type of peanut butter, but use what you have on hand)
1/3 cup chicken or beef stock
2 tbsp. brown sugar
1 tbsp. lemon or lime juice
1 tsp. fish sauce
1 tsp. soy sauce
dash of cayenne pepper to taste (optional)

Other
wooden skewers (1 per chicken strip) soaked in water for 30 minutes
non-stick cooking spray


Directions:
In a medium bowl, whisk together all ingredients for the marinade except the chicken. Add the chicken strips and toss to coat the marinade evenly over each. Cover and refrigerate for 2 hours.

After 2 hours, skewer the chicken strips onto the soaked wooden skewers. Discard any remaining marinade.

In the meantime, make the peanut sauce. In a small saucepan over medium low heat, whisk together all ingredients for the peanut sauce. Once it begins to simmer, cook for 5 minutes until smooth and slightly thickened. Remove from heat and transfer to a small serving bowl.

Heat a grill pan over medium high heat. Spray with cooking spray to prevent sticking. Grill the chicken for 3-4 minutes per side or until cooked through. 

Serve the chicken skewers along with the peanut sauce. Yum!


Basil Pesto

Ahhh pesto - such a humble sauce. A few simple ingredients come together to make a classic pasta dish that's hard to beat. Our herb garden really did well this year (well, not all herbs, but most did fine) and we found ourselves with a ton of extra basil... not a bad thing! I decided that it was time, once and for all, to try my hand at a yummy basil pesto. Traditionalists will tell you that pesto should only be made with a knife or mortar and pestle - no food processors or other electronics. Well, sorry traditionalists, but I don't have an extra 30 minutes to spend in my kitchen milling a pile of herbs to fine bits. (I'm sure it tastes awesome. If you have the time and patience to make it by hand, by all means go for it... and bring me some when you're done!). I chose to use my food processor for this because it is just so darn convenient.
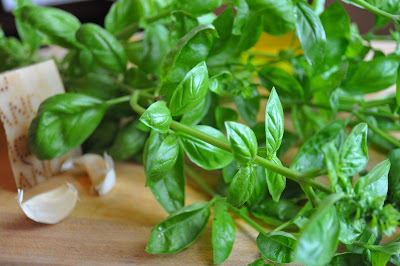
Beautiful Basil From Our Herb Garden

Because pesto is such a simple sauce, it's vital to use the best ingredients you can manage. That means no "parmesan" out of a green-lidded can, kiddos. Use the real stuff. Trust me. Also, look for basil that is young with smaller leaves if possible. I find that when basil matures and flowers it tends to get bitter, which will impact the flavor of your sauce (ick). Finally, take the time to toast the pine nuts. Holy cow do they taste so much better when you toast them! 


If you have a pile of basil lying around, or if you just love pesto, please give this a try. It's the best version I've found, and pretty darn simple as well! Enjoy!

Basil Pesto
serves 4

Ingredients
2 cups packed basil leaves, rinsed and patted dry
1 clove garlic
1/4 cup pine nuts, toasted
1/2 cup extra virgin olive oil
1/2 cup freshly grated parmesan or pecorino cheese (yes, the real stuff), plus extra for serving
1 pound dried pasta (I prefer whole grain spaghetti, but use what you like)

Cook the pasta in a large pot of salted water while you make the sauce. Reserve some of the cooking liquid before draining.

In a food processor fitted with a steel blade, pulse the basil, garlic and pine nuts until minced. You might have to stop and scrape down the bowl a couple of times if you have some runaways. Through the feed tube, slowly drizzle in the olive oil with the food processor running. Add the parmesan cheese and pulse a few times to incorporate. Season to taste with salt and pepper.

Toss together the pesto and pasta until well combined. Add a few splashes of pasta cooking water to help the sauce stick (I know it seems counter-intuitive, but the starchy water is like glue!) and toss again. Portion into serving bowls and top with a little more parmesan cheese. Yum!

p.s. This sauce would also be great on top of chicken or steak... mmm

Sunday, March 4, 2012

Sausage, Kale, and White Bean Soup

Wow, what an incredibly easy meal this is! I have seen similar soups to this one while out at restaurants and honestly, I never really paid much attention to them. They seem perfectly fine, but nothing too exciting. Well, I should have paid more attention to them! This soup is very versatile - just use whatever stock, green, sausage, and bean you have on hand. For the sausage use whatever kind you like best - next time I will try making this with hot Italian sausage for a little kick. You could use kale or any other green in this such as spinach, escarole, or beet greens, and for the beans use whatever you have in your pantry! The meaty sausage pairs so well with the creamy canellini beans and fresh kale to make a hearty soup that comes together in minutes, so give this soup a try! Enjoy :o)


Sausage, Kale, and White Bean Soup
Serves 4

Ingredients
1 tbsp. olive oil
1/2 lb. sausage (casings removed)
1/2 small onion, chopped
1 clove garlic, minced
1 quart low sodium chicken or beef stock
3 cups (packed) chopped kale
1 can of canellini beans, drained and rinsed
pinch of cayenne pepper
salt and pepper to taste

Directions
In a large pot, heat the olive oil over medium high heat. Add the sausage and use a wooden spoon to crumble it as it browns. Once the sausage is brown, add the onions and garlic and cook until the onions begin to soften, about 3 minutes. Add the kale, beans, and stock and bring to a boil. Add the cayenne and season to taste with salt and pepper. Allow the soup to simmer for about 5-10 minutes to blend the flavors, then serve. Yum!

Saturday, January 14, 2012

Roasted Garlic Hummus with Pita Chips

While continuing on our healthy kick for January, healthy snacks have been difficult at times. When we decided to host people at our place to watch the Patriots play, I decided that it would be a good opportunity to try hummus and accomplish 2 things - it would be a healthy snack, and I would get to cross something off my 30 by 30 list! This recipe is originally from Cook's Illustrated, but I made a few changes to suit our tastes. If you love garlic, you will love this hummus. I can't wait to try other versions using the same basic idea. Enjoy :o)


Roasted Garlic Hummus
makes approximately 2 cups

Ingredients
2 tbsp. olive oil
2 cloves garlic, peeled and sliced
1 (14 oz.) can chickpeas
¼ cup liquid from canned chickpeas
2 heads roasted garlic (*see note)
1 clove raw garlic, minced (optional)
½ tsp. salt
Pinch of cayenne pepper, to taste
3 tbsp. freshly squeezed lemon juice
6 tbsp. tahini
1 tbsp. fresh parsley, minced
pita chips for serving, recipe follows

Directions
Heat the olive oil in a small pan over medium low heat. Add the sliced garlic and cook until golden brown, about 10 minutes. Drain the garlic on paper towels and reserve the cooking oil. 

After reserving 1/4 cup of canning liquid, rinse and drain the chickpeas. In a food processor, combine the drained chickpeas, the roasted garlic, minced fresh garlic (this will make the hummus extra garlicky, so use with caution!), salt, and cayenne pepper. 

In a small bowl, combine the lemon juice and canning liquid. In another small bowl combine the tahini with the oil used to cook the sliced garlic.

With the food processor running, stream in the lemon/water mixture. Scrape down the bowl. Run the processor again and stream in the tahini/oil mixture. Scrape down the bowl and process again until smooth. 

To serve, top with the cooked sliced garlic and the chopped parsley. Serve with pita chips.

*note: to make roasted garlic, cut the top part of a whole head of garlic to expose the cloves. Drizzle with a little olive oil and wrap tightly in foil. Roast at 350 degrees for about an hour, or until the cloves are soft. Once cool enough to handle, squeeze the head of garlic to remove the roasted cloves. Discard any papery skins, and mash gently into a paste.

Pita Chips
Ingredients
1 package whole wheat pitas
2 tbsp olive oil
1/4 tsp salt
1/4 tsp garlic powder

Directions
Preheat the oven to 400. Cut the pitas into 8 wedges. Combine the remaining ingredients and brush a light coating onto the pitas. Bake for 7-8 minutes or until toasted. Serve with hummus.

Sunday, January 8, 2012

Mussels with Fennel, Garlic, and White Wine Sauce


One of our first dates was at Stella in Boston and we had a delicious dish of mussels in a spicy, creamy sauce. That was my first experience with mussels and I was hooked! Initially, I was a little turned off by the orangey color and "new" texture of mussels, being so used to clams, but I was converted at Stella. Since then, I have seen mussel dishes similar to this one at all types of restaurants, but it is so easy to make at home. These mussels are a delicious, healthy meal - and very filling. Definitely invest in some good, crusty bread to soak up all of the extra liquid from the bottom of the bowl. Enjoy!

Mussels with Fennel, Garlic, and White Wine Sauce
yield: 2 servings

Ingredients
1 pound fresh mussels (I get ones harvested from Maine at Whole Foods around here)
1 tbsp. olive oil or butter
1/2 small bulb fennel, cored and thinly sliced
1/2 small onion, diced
4 cloves garlic, minced
1/8 tsp. red pepper flakes, or to taste
1 cup white wine, such as pinot grigio
Crusty bread, lightly toasted, for serving

Directions:
Scrub and de-beard the mussels (look for beards poking out of the shells and pull them out). In a large pot, heat the oil or butter over medium heat. Add the fennel and onion and cook until the fennel is crisp-tender, about 5 minutes. Add the garlic and red pepper flakes and cook for 1 minute more. Add the wine and bring to a boil. Boil the mixture for approximately 5-7 minutes, or until it has reduced by half. Add in the mussels and cover the pot. The mussels will start to open after a couple of minutes - I find it helpful to shake the pot or give a big stir to help distribute the broth and also to help some of the mussels have more room to open. Once open, allow the mussels to cook for approximately 2 minutes, then remove to a serving bowl. Once all mussels have been removed, pour the cooking liquid over the mussels and serve with crusty bread on the side (discard any mussels that refuse to open after a few minutes - they don't want to be eaten, and trust me, you don't want to eat them either!). Yum! :o)

Monday, September 19, 2011

Fish in Parchment

Growing up, we frequently had fish in foil or parchment paper that was cooked in the oven or on the grill. In the little packets were the fish of the day, zucchini, onions, lemon, and anything else we had on hand. Recently I decided to play around with the flavors more to suit our cravings and this version was a huge success (says Andy!). This particular combination is Asian-inspired, but you can put almost anything in the packets with the fish and follow the same technique. The two major perks to this dish are 1) just throw away the paper for easy clean up and 2) it is a complete dish with protein, sides, and sauce all in one convenient packet! Have fun with it and experiment... enjoy :o)

Fish in Parchment
Makes 2 entree servings

Ingredients
1/2 - 3/4 lb. white, mild fish such as cod, hake, haddock, flounder, etc
1 cup green beans, ends trimmed and beans cut in half
1 cup sliced shiitake mushrooms, stems removed
1 small red potato, sliced thin
1 small shallot, peeled and sliced into thin rings
1 clove garlic, sliced paper thin

Sauce
1 tbsp. tamari or soy sauce
1 tbsp. hoisin
1 tbsp. oyster sauce
1 tbsp. agave or honey
1 tsp. rice vinegar
1/2 tsp. toasted sesame oil
5 drops sriracha sauce

Materials: 2 pieces of parchment paper or aluminum foil, about 18 inches long.

Directions
Preheat the oven to 425 degrees. Stir all sauce ingredients together and set aside. 

Assemble the packets: lay out both pieces of foil or parchment side by side on a flat surface. Layer half of the potatoes, shallot, garlic, beans, mushrooms and fish in the center of each paper. 
 Spoon half of the sauce over each packet.

Fold the packets by pulling up the long sides to each other and rolling down to the top of the fish, then tightly roll/pinch each side towards the fish as well to make a sealed packet. Make sure the packet is sealed well so the fish steams (staple shut if necessary).
 Put the packets on a baking sheet and bake in the preheated oven for 10-20 minutes (10 minutes for thin fish like flounder, 20 minutes for 1+ inch thick fish like cod or hake - adjust the cook time depending on the thickness of the fish you are using). You can also cook them on the grill, but I would recommend using only foil, and I think cooking time would vary by the grill, but it should work just fine.

Allow the packets to cool enough to handle, then rip them open and pour the whole packet out into a shallow or bowl - you will have more liquid than you started with so make sure your plate/bowl is deep enough. Yum! :o)