Pages

Showing posts with label Entree. Show all posts

Wednesday, August 7, 2013

Lamb Burgers with Cumin Mayonnaise and Feta


A lot of our food inspiration comes from experiences we have while eating out, traveling, or exploring new foods and ingredients. This particular recipe was directly inspired by April Bloomfield's lamb burger from The Breslin in New York City after Andy had the lucky experience of sampling it there for himself. He came back from New York raving about this silly lamb burger, so I asked him to describe it. He told me it was a lamb patty topped with salty feta, red onion, and some sort of cumin mayonnaise on a ciabatta-style roll... and that was about it. Salty, lamby, melt-in-your-mouth perfect burger goodness. I was jealous! Because we haven't had a chance to go [back] to The Breslin, we decided to make our own version of their famous burger at home, and after many trials we have a version that comes pretty darn close, according to Andy anyways. 

After doing some research, we found out that chef Bloomfield has a bakery that creates rolls specifically for her lamb burger, and because we haven't found the perfect Bostonian substitute we often just eat this bunless (we convince ourselves we do it that way because it's healthier... whatever, don't judge). Oh, and as a note on the red onion... don't skip it! It's the secret ingredient, I swear :o)

Thanks to the folks at Lilac Hedge Farm for bringing their delicious ground lamb to our local farmer's market!
Lamby goodness from Lilac Hedge Farm...mmmm

Lamb Burgers with Cumin Mayonnaise and Feta
Yield: 4 burgers

Ingredients
3 tbsp mayonnaise
1/2 tsp ground cumin
1 lb ground lamb
kosher salt
oil, for greasing skillet

toppings:
4 ounces of feta cheese, sliced into four 1/4 inch slices
1/4 red onion, peeled and sliced thin
ciabatta rolls (optional)


Directions
In a small bowl, mix together the mayo and cumin and set aside.

Preheat the oven to 400 degrees. Form the lamb into four patties and allow to sit at room temperature for about 30 minutes (ideally). Generously salt both sides of the burgers with kosher salt. 
Heat a cast iron skillet to medium heat and lightly oil, then add the burgers. Cook on each side for approximately 3 minutes, then transfer the skillet to the oven for about 5-8 minutes or until the internal temperature of the burgers is 145 degrees for medium rare (160 for medium). Remove to a plate and cover with foil to rest for about 5 more minutes before serving (resting is important to keep the burgers juicy!). 

Top each burger with some of the cumin mayo, a slice of feta, and some thinly sliced red onion. Serve and enjoy! Yum!


Tuesday, August 6, 2013

Simple Crab Salad

It's no secret that I love seafood, especially crab, and I am always looking for new recipes to  get my "fix". Unfortunately, many crab recipes seem to over-do it with extra ingredients that only hide the crab flavor instead of highlighting it. Frustrated, I came up with this super simple crab salad recipe, which is perfect for scooping up with toast as an appetizer, or spooning into split-top buns for a delicious dinner. The mild, sweet crab flavor really shines because there's not a lot of extra "stuff" in it, which makes me happy :o) Another great thing about this crab salad is you can totally customize it to suit your taste - add tarragon, leave out the celery, serve with avocado or tomato slices, and so on.

Because you can really taste the crab, it's important to use high quality, real crab meat (none of that krab stuff) - in certain stores I can find a 1 pound can of jumbo lump crab for around $15, which is a little pricey, but totally worth every penny! Enjoy! :o)


Simple Crab Salad
yield: 6 rolls (entree) or about 24 toasts (appetizer)

Ingredients
zest of 1/2 a lemon
1 tbsp lemon juice (about half of a lemon)
2 tbsp mayonnaise
1/2 tsp kosher salt
a few grinds of black pepper
1 pound good quality lump crab meat (gently check for shells)
1 stalk celery, diced
Toasted bread slices or rolls, for serving

Directions:
In a medium bowl whisk together the lemon zest and juice, mayonnaise, salt, and pepper. Add the crab meat and celery, and gently (carefully! Don't break up the lumps!) fold together. Cover and chill, or spoon into rolls or onto toasts and serve. Yum!

Friday, January 4, 2013

Soba Noodles with Shrimp and Cilantro

Do you have a flavor combination that you always gravitate towards? In our house it always seems to be one of three combinations: chocolate & peanut butter, lime & cilantro, or garlic & rosemary. Anytime I run across a recipe with those combinations as main ingredients it is almost always sure to be a hit. True to form, the combination of shrimp, lime, and cilantro in this recipe did not disappoint. 

Because this is a cold pasta dish, I think it would be especially tasty in the hot Summer months, but I decided to make it now because it fits in with our healthy eating regime for January... Biggest Loser is on again in the Tremble household (I hope to retain my title from last year!) and healthy dishes are dominating the menu. 

This was the first time I have cooked with Soba noodles and I am hooked! They are sooo good and I am happily searching for more ways to incorporate them in our meal rotation. 

Soba Noodles with Shrimp and Cilantro
Serves 2 

Ingredients:
6 oz. Soba noodles
1 1/2 tbsp low-sodium soy sauce
1 1/2 tbsp tamari
2 tbsp vegetable oil, divided
1/2 tsp. Sriracha sauce
1/2 tsp. agave syrup
zest of 1 lime
2 tbsp. lime juice (about 1 lime)
3 garlic cloves, peeled and minced
1/2 lb. shrimp, peeled and deveined
pinch of salt
1/4 cup cilantro leaves, roughly chopped
1 green onion, thinly sliced

Directions:
Cook the Soba noodles according to package directions. Drain and rinse under cold water.

In a large serving bowl, mix together the soy sauce, tamari, 1 tbsp. of the oil, Sriracha, and agave. Add the cooled Soba noodles and turn to coat in the sauce.

In a small bowl, mix together the lime zest, juice, garlic, shrimp, a pinch of salt, and the remaining 1 tbsp of oil. Heat a skillet over medium high heat and add the shrimp and lime juice mixture. Cook until the shrimp are barely cooked through, and then pour the shrimp and lime juice over the Soba noodles. Top with the cilantro and green onion and serve cold*. 

*This tastes even better if you make it ahead of time and store in the refrigerator until it's time to eat!


Slightly adapted from Food & Wine

Saturday, September 22, 2012

Butternut Squash and Mushroom Lasagna

I totally made this recipe up. Ok, don't worry, it's awesome! Recently I was put on bed rest because our little baby girl decided that she might want to make an early appearance into the world. As a result, I've had a lot of free time on my hands, which I have been putting to good use making up lists of foods and recipes that I am craving. Feeling the crisp fall air rolling in, my food cravings have been turning to comfort foods, squash, and hot beverages. Anyone else??

I think lasagna is one of those go-to comfort foods for many people. Traditionally, I stick to a hearty meat sauce, herby ricotta, and layers of pasta. Well, there's certainly nothing wrong with a traditional lasagna, but I was really craving and autumnal version of the classic - something that was a little lighter, but still comforting and something that accentuated the classic fall flavors I had such strong hankerings for. And so butternut squash and mushroom lasagna was born.

I poked around the interwebs for recipes (that Andy could make me, of course) and nothing caught my eye. Meh. Obviously, the next logical step would be to make something up. So I did! I completely made up a recipe. And you know what? It worked! Beautifully! Yes, I was as surprised as you. Squash and mushrooms replaced the meat, and bechamel replaced the red sauce, but the general idea was still there. Luckily I had made enough lasagna in my life to know the "basics" - no runny ingredients, use good pasta and multiple thin layers, have flavor packed into each component, and there must be a cheesy top.

If you like fall flavors, you will love this recipe. It's warm and comforting, but not super heavy, and the flavors all complement each other perfectly. Try it, you'll love it. This isn't the fastest recipe you'll have in your book, but man oh man is it delicious... and worth every ounce of effort! Oh, and make sure you get a 3 pound squash for this recipe as the butternut squash layers are the best part of the whole dish! Yum!


Butternut Squash and Mushroom Lasagna
Makes two 8"x8" pans, or one 11"x13" pan 

Ingredients
Butternut Squash Layer:
1 large butternut squash (3 pounds) peeled, seeded, and cut into 1 inch cubes
2 tbsp olive oil
1/2 tsp kosher salt
2 cups ricotta cheese
1 cup shredded mozzarella cheese
1 egg
1/2 tsp black pepper

Mushroom Layer:
1 tbsp. butter
1 small onion, diced
2 cloves garlic, minced
16 oz. cremini mushrooms, cleaned
3 tbsp. chopped sage leaves
1 (10 oz.) box of frozen chopped spinach, thawed and squeezed dry
salt and pepper, to taste

Bechamel Sauce:
5 tbsp. butter
5 tbsp. flour
4 cups milk
pinch of nutmeg
salt and pepper to taste

lasagna sheets (fresh are best (1/2 lb), but you can use dry - just follow the directions on the package)
1 cup shredded mozzarella cheese
1/4 cup shredded parmesan cheese


Directions:
Make the butternut squash layer. Preheat the oven to 425 degrees. Line a baking sheet with foil. Toss the butternut squash cubes with the olive oil, sprinkle with the salt and spread out on the baking sheet. Roast for 25-30 minutes, tossing once, until the squash is very tender. Puree the squash (or mash) until smooth. Transfer squash to a medium bowl and mix in the ricotta, mozzarella, and egg. Stir to combine, then set aside and allow to cool.

Make the mushroom layer. Melt the butter over medium heat in a large non-stick skillet. Add the onion and garlic and saute until beginning to soften, about 3 minutes. In the meantime, chop the mushrooms in a food processor (you can also chop by hand, but I found the food processor to be much easier!). You can go as chunky or fine as you want with the mushrooms, but smaller pieces make neater lasagna layers. Add the chopped mushrooms to the onions and garlic, and season with salt and pepper. Allow the mushrooms to cook down and release their liquid, then continue cooking until all of the liquid has evaporated, about 10 minutes total. Add the sage and spinach. Cook for 3 more minutes, then set aside and allow to cool.

Make the bechamel. In a medium pot, whisk together the flour and butter over medium heat until a smooth paste forms. Whisk in the milk. Continue whisking until the sauce thickens and coats the back of a spoon, about 5-7 minutes. Season with salt, pepper, and a few grates of nutmeg. Set aside.

Preheat the oven to 450 degrees.

Assemble the lasagna: You can use an 11x13" pan, or two 8x8" pans. (If you use the 8x8, you can freeze one for later... this is what I did and it will come in handy as a quick dinner when baby is here! Just assemble in a foil pan and cook according to the directions below. Cool, cover tightly with foil, and freeze. To re-heat, allow the lasagna to defrost in the fridge a day or two ahead of time, then cook at 400 degrees until heated through.).

In the bottom of the pan, spread a thin layer of bechamel, followed by one layer of pasta. Continue making thin layers as follows: squash, pasta, mushroom, bechamel, pasta, squash, pasta, bechamel. You should have two layers of butternut squash mixture and one layer of mushroom. Make sure you save enough bechamel to make a thin layer on top! On top of the last layer of bechamel, sprinkle the mozzarella and parmesan cheeses. 

Bake at 450 degrees for 15 minutes or until melty and hot. If you want a toastier top, feel free to broil for 2 minutes at the end. 

Phew! A lot of steps, but it's totally worth it. Enjoy! :o)

Thursday, August 23, 2012

Broccoli and Chicken Stir Fry with Spicy Peanut Sauce

Disclaimer: this recipe sounds strange. The first time I stumbled across this dish I was so confused - broccoli and peanut butter... together?? Ew. But alas, it is a delicious combination! The peanut sauce is salty, spicy, and slightly sweet and paired with the broccoli and chicken it makes a (surprisingly) delicious dish. Trust me! Oh, and you can easily make this vegetarian by leaving out the chicken and using vegetable stock, so that's always a bonus.

After making chicken satay the other night we found ourselves with some extra peanut sauce (never a bad thing) and I figured I would give it a try as a stir fry sauce and it ended up working perfectly! I think I will always meal plan to have these two dishes in the same week so I can make the sauce once and use it for two recipes... hooray for laziness. Give this recipe a try. It might sound a little weird at first, but it's truly delicious, not to mention very healthy! Enjoy :o)

Broccoli and Chicken Stir Fry with Spicy Peanut Sauce
serves 2

Ingredients
1 tsp. vegetable oil
1 boneless, skinless chicken breast, cut into 1 inch cubes
3 cups broccoli florets
1/2 red or orange bell pepper, cut into 1 inch strips
1/4 cup stock (chicken, beef, or vegetable all work fine)
1/2 cup peanut sauce
red pepper flakes to taste (about 1/4-1/2 tsp)
salt and pepper to taste 
cooked rice for serving (optional)

In a large wok or non-stick skillet, heat the oil over medium high heat. Add the chicken and season with a little salt and pepper. Cook, stirring occasionally, until lightly browned on all sides and cooked through. Remove to a plate. Add the broccoli, bell pepper and stock to the pan and bring to a simmer. Cover and cook for 5 minutes or until the broccoli is crisp-tender. Return the chicken to the pan and add the peanut sauce and red pepper flakes, stirring to coat everything evenly. Cook until everything is heated through, 2 minutes. Serve the stir fry on its own or over rice. Enjoy while hot. Yum!


Tuesday, August 21, 2012

Chicken with Peanut Satay Sauce

Ok ok before all you know-it-alls get antsy, I realize this isn't a "traditional" satay sauce. I didn't grind my own peanuts, I omitted the ginger, and I'm fresh out of lemongrass, but this is still a delicious peanut satay inspired dish. For those of you unfamiliar with satay, it is basically meat that has been marinated and grilled, then dipped in a sweet and salty peanut butter sauce. It's divine. This version is no exception. 

After researching a variety of satay recipes, I found some common ingredients and decided to venture off on my own to make a simplified, yet tasty version using what I had on hand (gosh that seems like a problem of mine). I am happy to report that the experimenting paid off! I wasn't planning to blog this dish, but halfway through dinner I forced Andy to stop eating so I could snap a few photos to add to the blog. He got a little grumpy, but I succeeded. The flavors of this dish are appealing to both adults and kids alike, and this could easily be served as a main dish protein along side a veggie and some rice (edamame in our case), or it could be served room temperature as an appetizer. Whatever floats your boat. Enjoy!

Chicken with Peanut Satay Sauce
Serves 2 main dish portion

Ingredients
Marinade
1/4 cup coconut milk
1 clove of garlic, minced
1/2 tsp. curry powder
1 tsp. brown sugar
1/4 tsp. salt
1/4 tsp. black pepper
2 boneless, skinless chicken breasts cut lengthwise into 1/4 inch strips

Peanut sauce
1/2 cup coconut milk
2 tsp. curry powder
1/4 cup creamy peanut butter (the "natural" peanut butter is better than a Jif or Skippy type of peanut butter, but use what you have on hand)
1/3 cup chicken or beef stock
2 tbsp. brown sugar
1 tbsp. lemon or lime juice
1 tsp. fish sauce
1 tsp. soy sauce
dash of cayenne pepper to taste (optional)

Other
wooden skewers (1 per chicken strip) soaked in water for 30 minutes
non-stick cooking spray


Directions:
In a medium bowl, whisk together all ingredients for the marinade except the chicken. Add the chicken strips and toss to coat the marinade evenly over each. Cover and refrigerate for 2 hours.

After 2 hours, skewer the chicken strips onto the soaked wooden skewers. Discard any remaining marinade.

In the meantime, make the peanut sauce. In a small saucepan over medium low heat, whisk together all ingredients for the peanut sauce. Once it begins to simmer, cook for 5 minutes until smooth and slightly thickened. Remove from heat and transfer to a small serving bowl.

Heat a grill pan over medium high heat. Spray with cooking spray to prevent sticking. Grill the chicken for 3-4 minutes per side or until cooked through. 

Serve the chicken skewers along with the peanut sauce. Yum!


Basil Pesto

Ahhh pesto - such a humble sauce. A few simple ingredients come together to make a classic pasta dish that's hard to beat. Our herb garden really did well this year (well, not all herbs, but most did fine) and we found ourselves with a ton of extra basil... not a bad thing! I decided that it was time, once and for all, to try my hand at a yummy basil pesto. Traditionalists will tell you that pesto should only be made with a knife or mortar and pestle - no food processors or other electronics. Well, sorry traditionalists, but I don't have an extra 30 minutes to spend in my kitchen milling a pile of herbs to fine bits. (I'm sure it tastes awesome. If you have the time and patience to make it by hand, by all means go for it... and bring me some when you're done!). I chose to use my food processor for this because it is just so darn convenient.
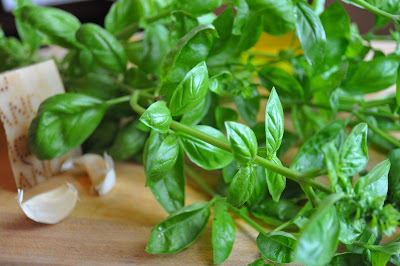
Beautiful Basil From Our Herb Garden

Because pesto is such a simple sauce, it's vital to use the best ingredients you can manage. That means no "parmesan" out of a green-lidded can, kiddos. Use the real stuff. Trust me. Also, look for basil that is young with smaller leaves if possible. I find that when basil matures and flowers it tends to get bitter, which will impact the flavor of your sauce (ick). Finally, take the time to toast the pine nuts. Holy cow do they taste so much better when you toast them! 


If you have a pile of basil lying around, or if you just love pesto, please give this a try. It's the best version I've found, and pretty darn simple as well! Enjoy!

Basil Pesto
serves 4

Ingredients
2 cups packed basil leaves, rinsed and patted dry
1 clove garlic
1/4 cup pine nuts, toasted
1/2 cup extra virgin olive oil
1/2 cup freshly grated parmesan or pecorino cheese (yes, the real stuff), plus extra for serving
1 pound dried pasta (I prefer whole grain spaghetti, but use what you like)

Cook the pasta in a large pot of salted water while you make the sauce. Reserve some of the cooking liquid before draining.

In a food processor fitted with a steel blade, pulse the basil, garlic and pine nuts until minced. You might have to stop and scrape down the bowl a couple of times if you have some runaways. Through the feed tube, slowly drizzle in the olive oil with the food processor running. Add the parmesan cheese and pulse a few times to incorporate. Season to taste with salt and pepper.

Toss together the pesto and pasta until well combined. Add a few splashes of pasta cooking water to help the sauce stick (I know it seems counter-intuitive, but the starchy water is like glue!) and toss again. Portion into serving bowls and top with a little more parmesan cheese. Yum!

p.s. This sauce would also be great on top of chicken or steak... mmm

Tuesday, June 26, 2012

Pizza Dough.... finally!

A couple of years ago, Andy and I ventured into the world of homemade pizza. At the time, that meant a ball of store-bought dough and a greased baking sheet...easy peasy. We loved experimenting with toppings and ended up making some pretty great creations! After researching pizza a little bit more, we adapted and updated our technique. We swapped out the baking sheet for a pizza stone, we played around with the cooking time and temp, tried versions with cornmeal vs. flour vs. oil as a base, and we experimented with types and quantities of toppings. 

The pizza was good. Real good. But something was still not quite right... the crust. Don't get me wrong, the store-bought stuff did it's job by holding the toppings and crisping up, but it just wasn't exactly what we were hoping for. We both agreed that we prefer a thinner, chewier crust as opposed to the puffy and doughy version that our store version provided for us. Thus began the new - and most difficult part of our - pizza endeavor. Crust. 

Well, as it turns out me and yeast do not get along. Our tumultuous relationship has become evident with my failed attempts at various homemade breads and baked goods, and apparently pizza dough, as well. (Insert discouraged sigh here). Not going down without a fight, I continued searching and discovered The Bread Baker's Apprentice and the slow and cold rise pizza dough method. Say whaaat? No warming water for yeast? No finicky temperatures to deal with? No proofing on the counter? Sign me up!!

This dough is perfect. I have come to realize that everyone likes their pizza slightly different, but for us this is THE crust for two reasons. One: it is foolproof and effortless to make (trust me, throw it in the fridge and leave it alone). Two: it has the perfect consistency, especially when baked on a pizza stone. The only downfall is that it takes a little planning ahead. For example, if you want to make pizza on Friday night, you should make the dough on Monday so it has proper time to come together by dinner at the end of the week (see this nifty fermentation timeline). Also, you need to take the dough out a couple of hours before you bake it, so if you aren't good at planning ahead this might take some serious iPhone reminders to plan for. It's worth it. Trust me.

Pizza Dough
Makes 6 balls of 6 oz. dough, or 4 balls of 9 oz. dough 

Ingredients
4 1/2 cups unbleached bread or all-purpose flour, chilled 
1 3/4 tsp. kosher salt
1 tsp. instant yeast 
1/4 cup good olive oil 
1 3/4 cups water, ice cold 
cornmeal for dusting

Directions:
In the bowl of an electric mixer fitted with the paddle attachment, stir together the flour, salt and yeast. Slowly mix in the oil and water on low speed until the flour is absorbed. Switch to the dough hook and mix the dough on medium speed for 5-7 minutes or until a smooth, sticky dough is formed (the dough should clear the sides, but stick to the bottom). Add more water or flour, as necessary, to create a springy, sticky dough (not just a little tacky... like sticky). The temperature of the dough should be around 50-55 degrees F.

Sprinkle some flour on the counter or on a board and dump out the dough. Using floured hands split it into 6 equal portions, and form the dough into 6 smooth dough balls. FYI: the dough could also be split into 4 (9 oz.) portions for a larger pizza. Lightly coat each portion of dough with olive oil (the spray kind in a can makes this easier) and put into individual plastic food storage bags. If you are using the dough within 3-5 days, pop it into the fridge, otherwise you can freeze it for future use (lasts up to 3 months). Just take the frozen dough out of the fridge about 5 days prior to the day you want to use it and continue with the next step.

On the day you want to cook the pizza - 2 hours before meal time: sprinkle the counter lightly with flour, and use a little more spray oil to spritz the top of the flour. Dump the dough ball on top of the oil/flour and gently press into a disk about 1/2 inch thick. Sprinkle with more flour, mist with a little more oil, and cover loosely with a piece of plastic wrap. Walk away for 1.5 hours.

1.5 hours later, preheat your oven and pizza stone to the highest possible temperature that your oven will allow (mine goes up to 500 degrees). Let it pre-heat for at least 30 minutes. If you are using a sheet tray, do not pre-heat the pan.

After 2 hours are up: Dust a pizza peel with cornmeal and form one ball of dough into a large circle with floured hands. (If you're brave, try tossing it!). When the dough is about 9-12 inches in diameter, gently shake the pizza peel to make sure the dough hasn't stuck (that is a miserable situation to be in when you try to slide it into the oven, trust me) and add more cornmeal, if needed. Brush the outer 1 inch edge of the dough with olive oil, then top as desired**. 


Slide the topped pizza onto your pizza stone and bake for about 6-10 minutes, depending on your oven, rotating as necessary to ensure even cooking. Once the pizza looks ready, remove to a cutting board. Allow it to rest for about 3 minutes (the longest 3 minutes of your life... but otherwise it will be a mess!) then cut and serve. Yummmmm!

** Topping disclaimer: get as creative as you want with sauces, cheeses, meats, veggies, etc. But as a fair warning, less is more! If you have Andy-Syndrome (aka The Kitchen Sink Problem) you will be tempted to pile on tons of toppings. Don't. Resist the urge. Less is more. A light coating of sauce, a light sprinkle of cheese, and 2-3 carefully chosen toppings are all you need. Our favorite pizzas have been ones with cheese plus 2 toppings! Proceed as you see fit, but consider yourself warned :o)
Pepperoni Pizza... simple and delicious!!

Adapted from The Bread Baker's Apprentice by Peter Reinhart


Saturday, March 24, 2012

Crab Imperial

I'm pretty sure that fresh lump crab meat is one of my favorite things in the world. If you haven't noticed a good percentage of the recipes on here revolve around this awesome ingredient, but I am always on the hunt for a new one to throw into the rotation. This crab imperial was absolutely fantastic! I had heard of crab imperial before, but I wasn't really sure what it was - it wasn't until my issue of Food & Wine came in the mail that I actually figured out what it is. It is basically a crab casserole which is usually served in scallop shells, topped with Parmesan and baked (basically like a stuffed clam, but with crab). The base of the casserole is typically mayonnaise, but this version from F&W caught my eye because the base is basically a hollandaise sauce thickened with a bechamel sauce - in other words... yummy! I also liked the addition of red bell pepper in this to add a little crunch and color, so I kept that in my version as well. Ok, this probably isn't the heathiest dish ever, but holy cow is it delicious! If you like crab, give this a try as a main dish or as an appetizer at your next gathering. Enjoy! :o)

Crab Imperial
Serves 2 (main dish) or 4 (appetizer)

Ingredients
4 tbsp. butter
1 tbsp. flour
3/4 cup milk
1 tsp. olive oil
1/2 small onion, finely diced
1/4 red bell pepper, diced
1 egg yolk
1 tbsp. fresh lemon juice
zest of 1/2 of a lemon, finely grated
dash of hot sauce
salt and pepper
1/2 lb. lump crab meat, picked over for shells
toasted baguette slices, for serving

Directions
Make the bechamel: In a saucepan set over medium low heat, melt 1 tbsp. of the butter. Whisk in the flour until a paste forms. Add the milk and continue whisking until the bechamel thickens, about 5 minutes. Season with salt, pepper, and hot sauce. Set aside.

Cook the vegetables: Heat the oil in a small saute pan over medium low heat. Add the onion and cook until translucent. Add the bell peppers and season with salt and pepper. Continue cooking until the peppers are softened, about 5 minutes. Set aside.

Make the hollandaise: Melt 3 tbsp. butter and set aside. Bring 1 inch of water to a simmer in a small sauce pan. In a medium glass or stainless steel bowl, whisk together the egg yolk and lemon juice. Place the bowl over the simmering water (make sure the bowl doesn't touch the water) and whisk constantly until the egg mixture thickens, about 3 minutes. Slowly drizzle in the melted butter and season with salt and pepper. Remove from the heat and whisk in the lemon zest and the bechamel sauce until smooth.

Put it all together: Adjust your oven racks to be 6" and 10" away from the broiler, then preheat the broiler. Lightly oil an 8" round or square baking dish. In a large bowl, gently fold together the crab meat, onions and peppers, and bechamel/hollandaise mixture until well combined. Pour into the prepared baking dish and broil at 6" away from the broiler for about 3-6 minutes or until it is browned and bubbly. Move the dish to the rack that is 10" away from the broiler and continue to broil for about 4 minutes or until it is completely warmed through. Serve hot with toasted bread. Yum! :o)


Adapted from Food & Wine

Tuesday, March 20, 2012

Chicken in Mustard Cream Sauce

Mustard is one of those ingredients that I underestimate. As far as condiments go, I'm likely to reach for ketchup for my burger, or mayonnaise for my sandwiches, so mustard kind of takes a back seat. However, this meal is really all about the mustard. It's not overpowering, but it adds just enough tangy mustardy flavor to make boring-old-chicken into something much tastier. This will certainly be added to our rotation of chicken dishes as it was a huge hit! Enjoy :o)

Chicken in Mustard Cream Sauce
Serves 4

Ingredients
2 chicken breasts, boneless/skinless, cut in half into two thin cutlets
1 tbsp. butter
1 tbsp. vegetable oil
salt and pepper
1/4 cup minced onion or shallot
1/2 cup dry white wine
1/2 cup low-sodium chicken stock
1/4 cup heavy cream
2 tbsp. whole grain mustard
1 tbsp. smooth dijon mustard

Directions
Heat the butter and oil in a large sautee pan over medium high heat. Season the chicken on both sides with salt and pepper. Add the chicken to the sautee pan and cook until they are golden brown, about 2 minutes (resist the urge to move them as they will stick).  Turn the chicken over and cook on the second side for about 3 minutes longer, or until the juices run clear when poked with a knife. Remove the chicken to a plate and cover to keep warm.

In the same pan, make the mustard sauce. Keep the heat on medium high and add the onion. Cook for about 2 minutes until slightly softened, then add the wine. Scrape up the bits on the bottom of the pan, and raise the heat to high to bring the wine to a simmer. Continue cooking for 2-3 minutes or until there is about 2 tbsp. of liquid left in the pan. Add the chicken stock and simmer until reduced by half. Stir in the heavy cream, 1/2 tsp of salt, 1/4 tsp. of pepper,  and bring to a simmer. Let the sauce simmer until the sauce coats the back of a wooden spoon, about 2 minutes. Shut off the heat and stir in the mustards. Return the chicken to the pan and allow them to heat through before serving. Be generous with the sauce when serving! Yum! :o)


Adapted from The Williams Sonoma Cookbook and Smitten Kitchen

Saturday, March 3, 2012

Roasted Lemon Herb Chicken

Growing up, my mother frequently made us rosemary chicken for dinner. That's all she called it... rosemary chicken. It was simple, yet oh-so-delicious and fall off the bone tender! She used chicken drumsticks and pan roasted them on the stovetop with oil, butter, and rosemary, and that was pretty much it. No fancy frills, no time-consuming preparation, and best of all it only made one pan dirty! I have been playing around with making roast chickens lately, but they always cost more than just buying one of those pre-roasted chickens at the grocery store so it was hard to justify all that effort for a more-costly end result that wasn't all that much better. I decided it was time to change my plan. Inspired by Mom's rosemary chicken, as well as the frequent sales and great bargains I see on chicken drumsticks and thighs, I decided to roast only dark meat pieces of chicken that would be flavored with rosemary. Feeling the need to put my own "twist" on it (you must be used to that by now, Mom! Nothing personal, it's just how I roll) I decided to add some of my other favorite chicken flavor combinations that I enjoy such as lemon and garlic. I also know that thyme pairs incredibly well with chicken, so I threw that in there too for good measure. To reduce my efforts in the cooking process itself, I decided that roasting the chicken in the oven instead of babysitting it on the stove would be the way for me to go. The end result is supremely flavored chicken that is juicy and tender. If you're looking for a new chicken recipe to add to the rotation, give this one a try. Enjoy! :o)

Roasted Lemon Herb Chicken
Makes 2-4 servings

Ingredients
2-3 pounds of chicken drumsticks or thighs (bone-in, skin on)
zest of 2 lemons
juice of 2 lemons (about 1/3 cup)
4 garlic cloves, peeled and smashed
3 sprigs of thyme, leaves stripped off (about 1 tbsp.)
1 sprig of rosemary, leaves stripped off (about 1 tbsp.)
1 tsp. kosher salt
1/2 tsp. black pepper
2 tbsp. butter, melted

Directions:
In a large resealable plastic bag, mix together the lemon zest, juice, garlic, herbs, salt and pepper. Add the chicken and seal the bag, then turn to coat everything in the marinade. Refrigerate and let marinate for at least 2 hours or overnight.

Preheat the oven to 425 degrees. Line a 13x9 baking pan with parchment paper (I found aluminum foil reacted with the lemon juice in an unpleasant way. If you don't have parchment, just spray the pan well and hope it doesn't stick!). Arrange the chicken in the pan, skin side up, with a little space between each piece if possible. Brush the chicken with the melted butter. Roast for 15 minutes. Remove from the oven and pour the remaining marinade over the chicken to baste, then continue roasting for about 40 minutes or until the chicken is browned and cooked through.

Let rest for 10 minutes or so before serving. Yum!

Inspired by: Mom :o)

Monday, February 20, 2012

Mongolian Beef

I love P.F. Changs. There, I said it. There's something about that place that keeps drawing me back in, and I'm not afraid to admit it. However, in my quest to avoid take-out or processed foods as much as possible, I decided it would be a good challenge to try to make some of my restaurant favorites at home. I have already conquered chicken lettuce wraps, so next I decided to try Mongolian Beef which is one of Andy's go-to meals at P.F. Changs. Beef strips are stir-fried until slightly crispy, and then they are coated in a sweet, salty, and sticky sauce and the whole combination is served over fluffy rice. This is a very delicious meal, and while it's not the healthiest thing I've ever made, it saved us a few bucks to make at home. Mongolian Beef will be added to list of recipes to make again and again (though maybe not for another 12 months!). Yum!
Mongolian Beef
Serves 2-4

Ingredients
4 tsp. vegetable oil
2 tsp. ginger, minced or grated
2 tbsp. garlic, minced or grated
1 cup low sodium soy sauce
1 cup brown sugar, packed 
1 cup water
1 tbsp. cornstarch

1 cup vegetable oil
2 lb. flank steak
1/2 cup cornstarch
3 green onions, chopped

Cooked rice, for serving

Directions:
Make the sauce: In a small saucepan, heat the 4 tsp. of vegetable oil over medium heat. Add the garlic and ginger and sautee for 1 minute until fragrant (be careful not to burn). Add the soy sauce and brown sugar and bring the sauce to a simmer.  In a measuring cup, whisk together the water and 1 tbsp. cornstarch. Once the sauce has simmered for about 5-8 minutes, whisk in the water/cornstarch and return to a simmer to thicken slightly. Remove the sauce from the heat and set aside. 

Make the beef: Tilt your knife on a 45 degree angle and cut slices about 1/4 inch thick (against the grain). Coat the steak slices in cornstarch and shake to remove all excess. Lay the slices out on a cutting board and allow to sit for about 10 minutes to allow the cornstarch to set to the meat.

Heat the vegetable oil in a medium skillet until it just begins to shimmer. Working in batches, fry the beef (carefully) until it gets brown around the edges, about 2 minutes per side. Remove the beef to a paper towel lined plate and continue working in batches until all the beef is cooked. Dump all of the oil out of the skillet and return all of the beef to the pan. Add the sauce and sliced green onions and cook over medium low heat until the sauce has coated and everything is heated through. Serve over cooked rice. Yum!

Sunday, February 19, 2012

Greek Quesadillas

Thanks to Pinterest (my newest obsession) I have been discovering all types of new recipes and edible treats to try... where to begin?? Well, one particular idea that immediately made my mouth water was Greek Quesadillas. I love gyros, I love quesadillas, I love finger foods, so why haven't I thought of this before? We have come up with a wonderful version of easy-to-make lamb gyros, so I used that when making my own version of these Greek quesadillas. I think that these would be perfect for entertaining, tailgating, or for a crowd-pleasing appetizer. The best part is that each component can be made ahead of time (the tzatziki is better the next day, anyways) and then assembled and cooked right before serving. Rich and crispy lamb, cool tzatziki, and fresh crunchy vegetables come together for a delicious fusion meal. Yum!

Greek Quesadillas
Makes 4-6

Ingredients:

Tzatziki
1/2 english cucumber
1/2 tbsp. salt
6 oz. greek yogurt
2 oz. crumbled feta
1/2 tsp. garlic powder

Lamb
1 tbsp. olive oil
2 lbs. ground lamb
salt and pepper, to taste
1/2 red onion, minced
1 tsp. dried oregano
4 cloves garlic, minced
2 tbsp. tomato paste
4 tbsp. dry red wine

Assembly
1 tomato, seeded and chopped fine
1/2 red onion, chopped fine
1/2 cucumber, chopped fine
flour tortillas
shredded mozzarella cheese

Make the tzatziki: using a box grater, shred the cucumber on the side with the largest holes. Put cucumber in a strainer over a bowl and sprinkle with the salt. Allow to sit for 10-15 minutes to draw some of the water out of the cucumber. After 10-15 minutes, rinse and squeeze out the cucumber to remove as much liquid as possible. In a small bowl, mix together the cucumber, yogurt, feta, and garlic. Cover and refrigerate until you are ready to eat (the flavors blend really well after a day or so, but it's still really good right after you make it).

Make the lamb: In a large skillet, heat the oil over medium high heat. Add the lamb and stir frequently to break apart the meat. Season with salt and pepper. Continue cooking and stirring for 8-10 minutes or until the lamb is getting brown and crispy, and most of the liquid has evaporated. Add the onions, garlic, and oregano and continue cooking for 5 minutes or until the onions have softened. Add the tomato paste and stir to coat the meat. Add the red wine and continue to cook until all of the liquid has evaporated.

To assemble the quesadillas: Preheat a nonstick pan or panini press. Sprinkle a little mozzarella cheese on 1/2 of a tortilla. Layer some of the lamb on top of the cheese (it depends on the size of the tortilla, but I was able to make 6 quesadillas with the size I used). Sprinkle on some diced cucumber, tomato, and onion, then top with a little more mozzarella cheese for the glue. Fold over the tortilla and cook in a panini press or in a nonstick skillet until golden brown and the cheese is melty. Slice into wedges and serve with the tzatziki for dipping. Enjoy! :o)

Sunday, January 8, 2012

Mussels with Fennel, Garlic, and White Wine Sauce


One of our first dates was at Stella in Boston and we had a delicious dish of mussels in a spicy, creamy sauce. That was my first experience with mussels and I was hooked! Initially, I was a little turned off by the orangey color and "new" texture of mussels, being so used to clams, but I was converted at Stella. Since then, I have seen mussel dishes similar to this one at all types of restaurants, but it is so easy to make at home. These mussels are a delicious, healthy meal - and very filling. Definitely invest in some good, crusty bread to soak up all of the extra liquid from the bottom of the bowl. Enjoy!

Mussels with Fennel, Garlic, and White Wine Sauce
yield: 2 servings

Ingredients
1 pound fresh mussels (I get ones harvested from Maine at Whole Foods around here)
1 tbsp. olive oil or butter
1/2 small bulb fennel, cored and thinly sliced
1/2 small onion, diced
4 cloves garlic, minced
1/8 tsp. red pepper flakes, or to taste
1 cup white wine, such as pinot grigio
Crusty bread, lightly toasted, for serving

Directions:
Scrub and de-beard the mussels (look for beards poking out of the shells and pull them out). In a large pot, heat the oil or butter over medium heat. Add the fennel and onion and cook until the fennel is crisp-tender, about 5 minutes. Add the garlic and red pepper flakes and cook for 1 minute more. Add the wine and bring to a boil. Boil the mixture for approximately 5-7 minutes, or until it has reduced by half. Add in the mussels and cover the pot. The mussels will start to open after a couple of minutes - I find it helpful to shake the pot or give a big stir to help distribute the broth and also to help some of the mussels have more room to open. Once open, allow the mussels to cook for approximately 2 minutes, then remove to a serving bowl. Once all mussels have been removed, pour the cooking liquid over the mussels and serve with crusty bread on the side (discard any mussels that refuse to open after a few minutes - they don't want to be eaten, and trust me, you don't want to eat them either!). Yum! :o)